

The modern digital landscape is built on subscriptions. From streaming services to premium app features, the monthly charges can quickly stack up, creating what many call the “subscription trap.” Accidentally signing up for an expensive free trial only to forget about the automatic renewal is an all-too-common headache.
Fortunately, if you’re an iPhone user, Apple makes it straightforward to review, manage, and definitively cancel your automatic renewal services. Whether you’re trying to eliminate an unused premium app or simply auditing your recurring billing, here is the official, up-to-date guide for taking control of your Apple ID subscriptions.
The Easiest Method: Canceling Subscriptions via the Settings App
The quickest and most reliable way to access all active and expired services linked to your Apple ID is directly through your iPhone’s main Settings application. This method works perfectly for canceling almost any app subscription billed through Apple, including Apple Music, iCloud storage plans, and third-party apps downloaded from the App Store.
Step-by-Step Guide: Using the Settings App
- Open Settings: Tap the grey gear icon on your home screen.
- Access Your Profile: Tap on your name/photo banner displayed prominently at the very top of the Settings screen (this is your Apple ID profile).
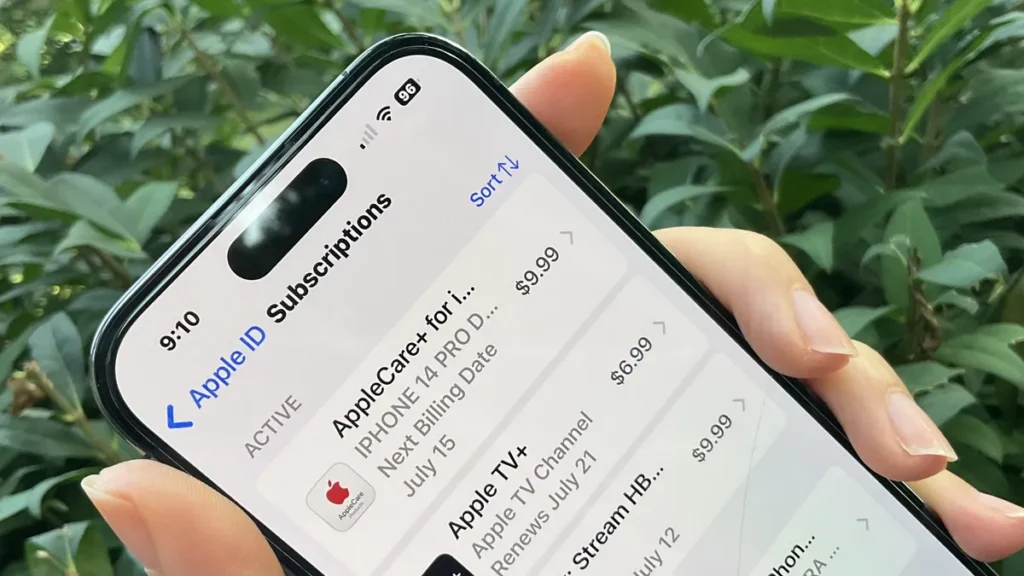
- Select Subscriptions: On the Apple ID screen, locate and tap the ‘Subscriptions’ option. It may take a moment for the list to load fully.
- Find the Subscription to Cancel: Under the ‘Active’ section, find the specific service you wish to stop billing for. Tap on its name.
- Cancel the Renewal: Scroll down to the bottom and tap the red Cancel Subscription button.
Pro Tip: If you don’t see the red button but instead see options like “Resubscribe,” that means the subscription is already canceled and will not auto-renew when the current billing cycle ends. You’re safe!
Alternative Method: Managing Subscriptions in the App Store
If you prefer to navigate directly through the App Store, the process is slightly different but achieves the same result. This method is often preferred when you’re already browsing for new apps or services.
Canceling Through the App Store Profile
- Open the App Store: Tap the blue App Store icon.
- Tap Your Profile Picture: Locate and tap your small profile photo or initial icon in the upper right-hand corner.
- Access Account Settings: On the Account page, tap Subscriptions. You may need to authenticate this step using Face ID, Touch ID, or your passcode.
- Cancel: Locate the desired service, tap it, and select Cancel Subscription.
Essential Things to Know Before You Hit ‘Cancel’
Before you finalize the cancellation process, it is critical to understand how Apple handles subscription cancellations. Avoiding confusion over billing dates and access is key to maintaining a smooth user experience.
Understanding Access After Cancellation
- Immediate Cancellation is Rare: When you cancel an automatic renewal, you typically do not lose access to the service immediately. Instead, your access continues until the final date of the current billing cycle you have already paid for.
- Check the Expiration Date: Always note the ‘Expires on [Date]’ message that appears after you confirm the cancellation. This date is when your access will cease.
- Refund Policy: Apple rarely offers refunds for partially used subscription periods. If you feel you were unjustly charged (e.g., the app was defunct or misleading), you must request a refund directly from Apple’s support portal using the ‘Report a Problem’ feature on your purchase history.
- Free Trials: If you cancel a free trial, your access may end instantly. If you are certain you do not want the service, it is often safer to cancel within 24 hours of starting the trial to avoid unexpected charges.
- View Billing History: If you are unsure exactly what you are paying for, you can view your entire purchase and billing history within the main Apple ID section of the Settings app.
What About External and Third-Party Subscriptions?
It is important to recognize that not every service you use on your iPhone is billed through Apple ID. Many major platforms utilize their own direct billing systems to avoid Apple’s commission fee. For these services, the cancellation steps above will not work.
Common examples of external services include Spotify Premium, Netflix, Amazon Prime, and subscriptions purchased directly on a company’s website using a credit card or PayPal.
If the subscription does not appear in your Apple ID Subscriptions list, you must:
- Visit the official website (e.g., spotify.com or netflix.com) on your computer or through a web browser on your iPhone.
- Log into your account.
- Navigate to the Account Settings or Billing section.
- Cancel the automatic payment or recurring membership directly on their platform.
Final Thoughts
The ability to easily manage subscriptions directly on your iPhone is a major convenience feature that Apple provides. Making it a habit to audit your ‘Active’ subscription list every few months is the best way to prevent unnecessary recurring charges from draining your bank account.
By following these simple steps, you can definitively take control of your automatic renewal schedule and ensure you are only paying for the services you truly use.